Pumpkin Cornbread Waffles

I recently came up with these Pumpkin Cornbread Waffles, after a failed search for a pumpkin waffle recipe that suited my tastes, my pantry, and my love of whole grains. I stumbled upon a recipe for similar waffles, and was really disappointed to see that it used cornbread mix (which I’ve never bought and didn’t have). So, I adapted a tried and true waffle recipe from The Joy of Vegan Baking into these gems. I couldn’t have been happier with how these turned out!

title, pumpkin cornbread waffles

Pumpkin and warm spices is always a perfect match. What really makes these is the amazing texture (or ‘mouthfeel’ if you don’t dislike that word as much as I do) that the cornmeal gives!

IMG_3198

Pumpkin Cornbread Waffles (Yields 6 small waffles, using ½ cup of batter each.)
3 tbsp ground flax seeds
½ cup warm water
1 ¼ cups whole wheat flour
½ cup cornmeal
1 tbsp baking powder
1 tbsp coconut sugar
1 ½ tsp pumpkin pie spice
½ cup pumpkin puree
1 cup unsweetened non-dairy milk
¼ cup coconut oil, melted

In a medium bowl, whisk the ground flax and water together.
In a large bowl stir together the flour, cornmeal, baking powder, sugar, and spice.
Add the pumpkin, milk, and coconut oil to the flax/water mixture and whisk to combine.
Pour the liquids into the dry ingredients and fold until just combined.
Cook in a waffle maker, according to its directions.
Top with maple syrup or your favourite toppings, and enjoy!

Collage, pumpkin cornbread waffles

collage, pumpkin cornbread waffles 2

IMG_3195

I hope you enjoy my new favourite waffles as much as I am!

I’ve shared this post with Allergy-Free Wednesday #93, Healthy Vegan Friday #69, and Wellness Weekends (Nov14-18/2013).

You May Also Enjoy:
IMG_3032IMG_0960IMG_2969
Blueberry Corn Pancakes, Apple Cinnamon Ginger Waffles, Chickpea Flour Omelette

Golden Lentil Barley Soup

It’s been quite a while since I’ve posted a new recipe, but I’ve got one for you today. And it’s a keeper. And by keeper, I mean I had absolutely no problem eating this soup for five days straight. I loved it each and every time.

Anyone else loving fall as much as I am? I can’t get enough of cool crisp weather, gorgeous  colours, cozy layers, boots, and lots of hot tea and soup!

title lentilbarleysoup

This hearty lentil, barley, and root vegetable soup is pure cool-weather comfort food. It is also very simple to make. Once everything is in the pot and brought to a boil, you can turn it down and let it simmer while you do something else. I got it started one night after coming home from work, and just let it simmer while I relaxed with a book.

IMG_3873

Golden Lentil Barley Soup
1 tbsp coconut oil
1/2 an onion, diced
1 clove garlic, minced (1 tsp)
1 carrot, diced
1 small/medium turnip, diced
2 small or 1 large potato, peeled and diced
1/2 cup red lentils, rinsed, sorted, and drained
1/2 cup barley, rinsed and drained
1/2 tsp turmeric powder
1 tsp cumin powder
1/2 tsp ground black pepper
1/8-1/2 tsp cayenne powder, depending on how spicy you’d like it
6 cups vegetable broth or 6 cups water + 1 vegetable boullion cube (I used Harvest Sun)

Note:
Really, any sort of lentil would work in this soup but I prefer the creamy texture that red lentils give. Split red lentils will almost disappear in the soup and help to make it very creamy. Whole red lentils will be very soft, but won’t break down completely. I used a mix, because I only had a little bit of each kind left.

Heat coconut oil in a large pot over medium-high heat. Add onion and garlic, and sauté until translucent.
Add all of the other ingredients, stir well, and bring to a boil.
Turn heat to low, cover, and let simmer until the barley and vegetables are cooked, about 45-60 minutes. Make sure to stir occasionally.
Enjoy!

This soup will thicken up quite a bit as it sits and cools, so you may want to add a bit of water when reheating.

IMG_3875

I’ve shared this post with Health Vegan Friday #65Allergy-Free Wednesday #93, and Wellness Weekends (Nov14-18/2013).

What’s your favourite season?

Do you have any favourite soup recipes? Please share. 

You May Also Enjoy:
100_3525100_3845100_2869
Gingersnap Oatmeal with Instant Cranberry Sauce
Butternut Squash Miso Noodle Soup with Kale and Edamame
Spicy Peanut Vegetable Soup

Lemon Coconut Energy Bites

These lemony little gems were dreamed up out of necessity. I had three lemons in the fridge that needed to be used before I left for Victoria for five days. I had been meaning to try a raw lemon bar recipe with them, but I never got around to it. As lemon bars aren’t really portable I knew I had to save that recipe for another time. So I decided to use most of the same ingredients that would have gone into the lemon bars (lemon juice, coconut, oats, and dates) to make some energy bites for my trip.

IMG_3099

I have to say that I am very happy with how these turned out! Bright lemon flavour, a hint of coconut and nuttiness, and a natural sweetness from the dates and coconut. These lemony little bites of chewy goodness are perfect for travel and on-the-go snacks. Or you may just want to stand by the fridge and scarf a few down! Don’t worry, that’s okay too.

IMG_3094

Collage, lemon bars 1

Collage, lemon bars 2

Lemon Coconut Energy Bites (Yields 32 small squares)
1 1/2 cups oats
1 cup unsweetened shredded coconut
1 cup sliced/slivered/chopped almonds (raw or blanched)
Zest of 2 lemons
1 1/2 cups pitted dates (20-25 dates)
Juice of 3 lemons (about 1/2 cup)
Optional: 1/4 cup vanilla or berry flavoured protein powder (I like Vega One)

Notes:
If your dates aren’t soft then you should let them sit in a bowl of hot/warm water for at least 15 minutes before using.
I prefer to cut these into small squares because they pack easily into storage containers and I can choose the size of my snack better, however you could also make larger bars, or roll the dough into small balls. Totally up to you.
For gluten-free, just make sure your oats and protein powder are gluten-free.
For nut-free, use sunflower seeds or more oats, in place of the almonds.

Add the oats, coconut, almonds, lemon zest, and protein powder (if using) to a large bowl of a food processor and pulse until it is at your desired consistency: less if you like a chewier bar with larger pieces, or more if you’d like a finer texture.
Add the dates and process until they are in small pieces and mixed up with the other ingredients.
Add the lemon juice and process until everything is thoroughly mixed and clumping together. It may be crumbly, but should stick together when pressed.
Line a baking dish with parchment paper. I use a 11″x7″ pan, but the size doesn’t really matter as long as it is at least 8″x8″. Dump the mixture into the lined pan and press down until the top is relatively flat and even. With a sharp knife, cut into small squares or bars. Place the pan in the fridge for at least an hour, then transfer the squares or bars into an airtight container. Store in the fridge or freezer.
The energy bites will soften a bit when at room temperature, but they shouldn’t fall apart. Enjoy!

IMG_3124

IMG_3101

IMG_3126

I’ve shared this post with Slightly Indulgent Tuesdays (8/27/13), Allergy Free Wednesday (8/28/13)Gluten-Free Wednesdays (8/28/13)Raw Food Thursday (8/29/13), Healthy Vegan Friday, Wellness Weekends (8/29-9/2/13), Gluten Free Friday #55.

Pineapple Mango Creamsicles and Mixed Berry Ice Pops

It is definitely summer around here and while I’m loving the sunshine, I’m not a huge fan of the heat. What better way to beat the heat than with an icy totally guilt-free treat?! (Really didn’t intend for all the rhyming there!)

IMG_2554

Store-bought popsicles may be fruit-flavoured, but they are usually just frozen sugar-water, without any actual fruit in sight. These home-made popsicles taste even better than store-bought, are almost completely all fruit, and therefore completely guilt-free! They are also super quick and easy to make. If you know how to turn on a blender, than you can make these in about five minutes. The hardest part is waiting for them to freeze!

Pineapple Mango Creamsicles
1 cup pineapple chunks
1 cup mango chunks
1 cup canned coconut milk
1 cup unsweetened non-dairy milk (or more coconut milk, for an even creamier creamsicle)
1/2 tsp orange extract
Optional – sweetener to taste

IMG_2544IMG_2546

Mixed Berry Ice Pops
1 cup blueberries
1 cup other berries (raspberries, blackberries, cranberries, strawberries…) – You can choose one kind, or a mixture.
2 cups water or non-dairy milk
Optional – sweetener to taste

For both kinds, just throw everything in a blender and blend until smooth. Divide into whatever ice pop molds you have and place them in a freezer to freeze. Wait impatiently. Enjoy!

IMG_2555

IMG_2560IMG_2562

Notes:
– For both recipes, you can use either fresh or frozen fruit, or a combination of both. 

IMG_2729

IMG_2724

IMG_2727

I’ve shared this post with Raw Food Thursday (7/18/13), Allergy-Free Wednesday, Gluten Free Wednesdays (7/17/13), Healthy Vegan Friday #52, Gluten Free Friday #49, and Wellness Weekend (July 18-22).

Questions
Ice cream or popsicles?

What is your favourite popsicle flavour? Or the craziest flavour you’ve tried?
Feel free to share or link to the recipe!

Baked Mediterranean Chickpea Burgers

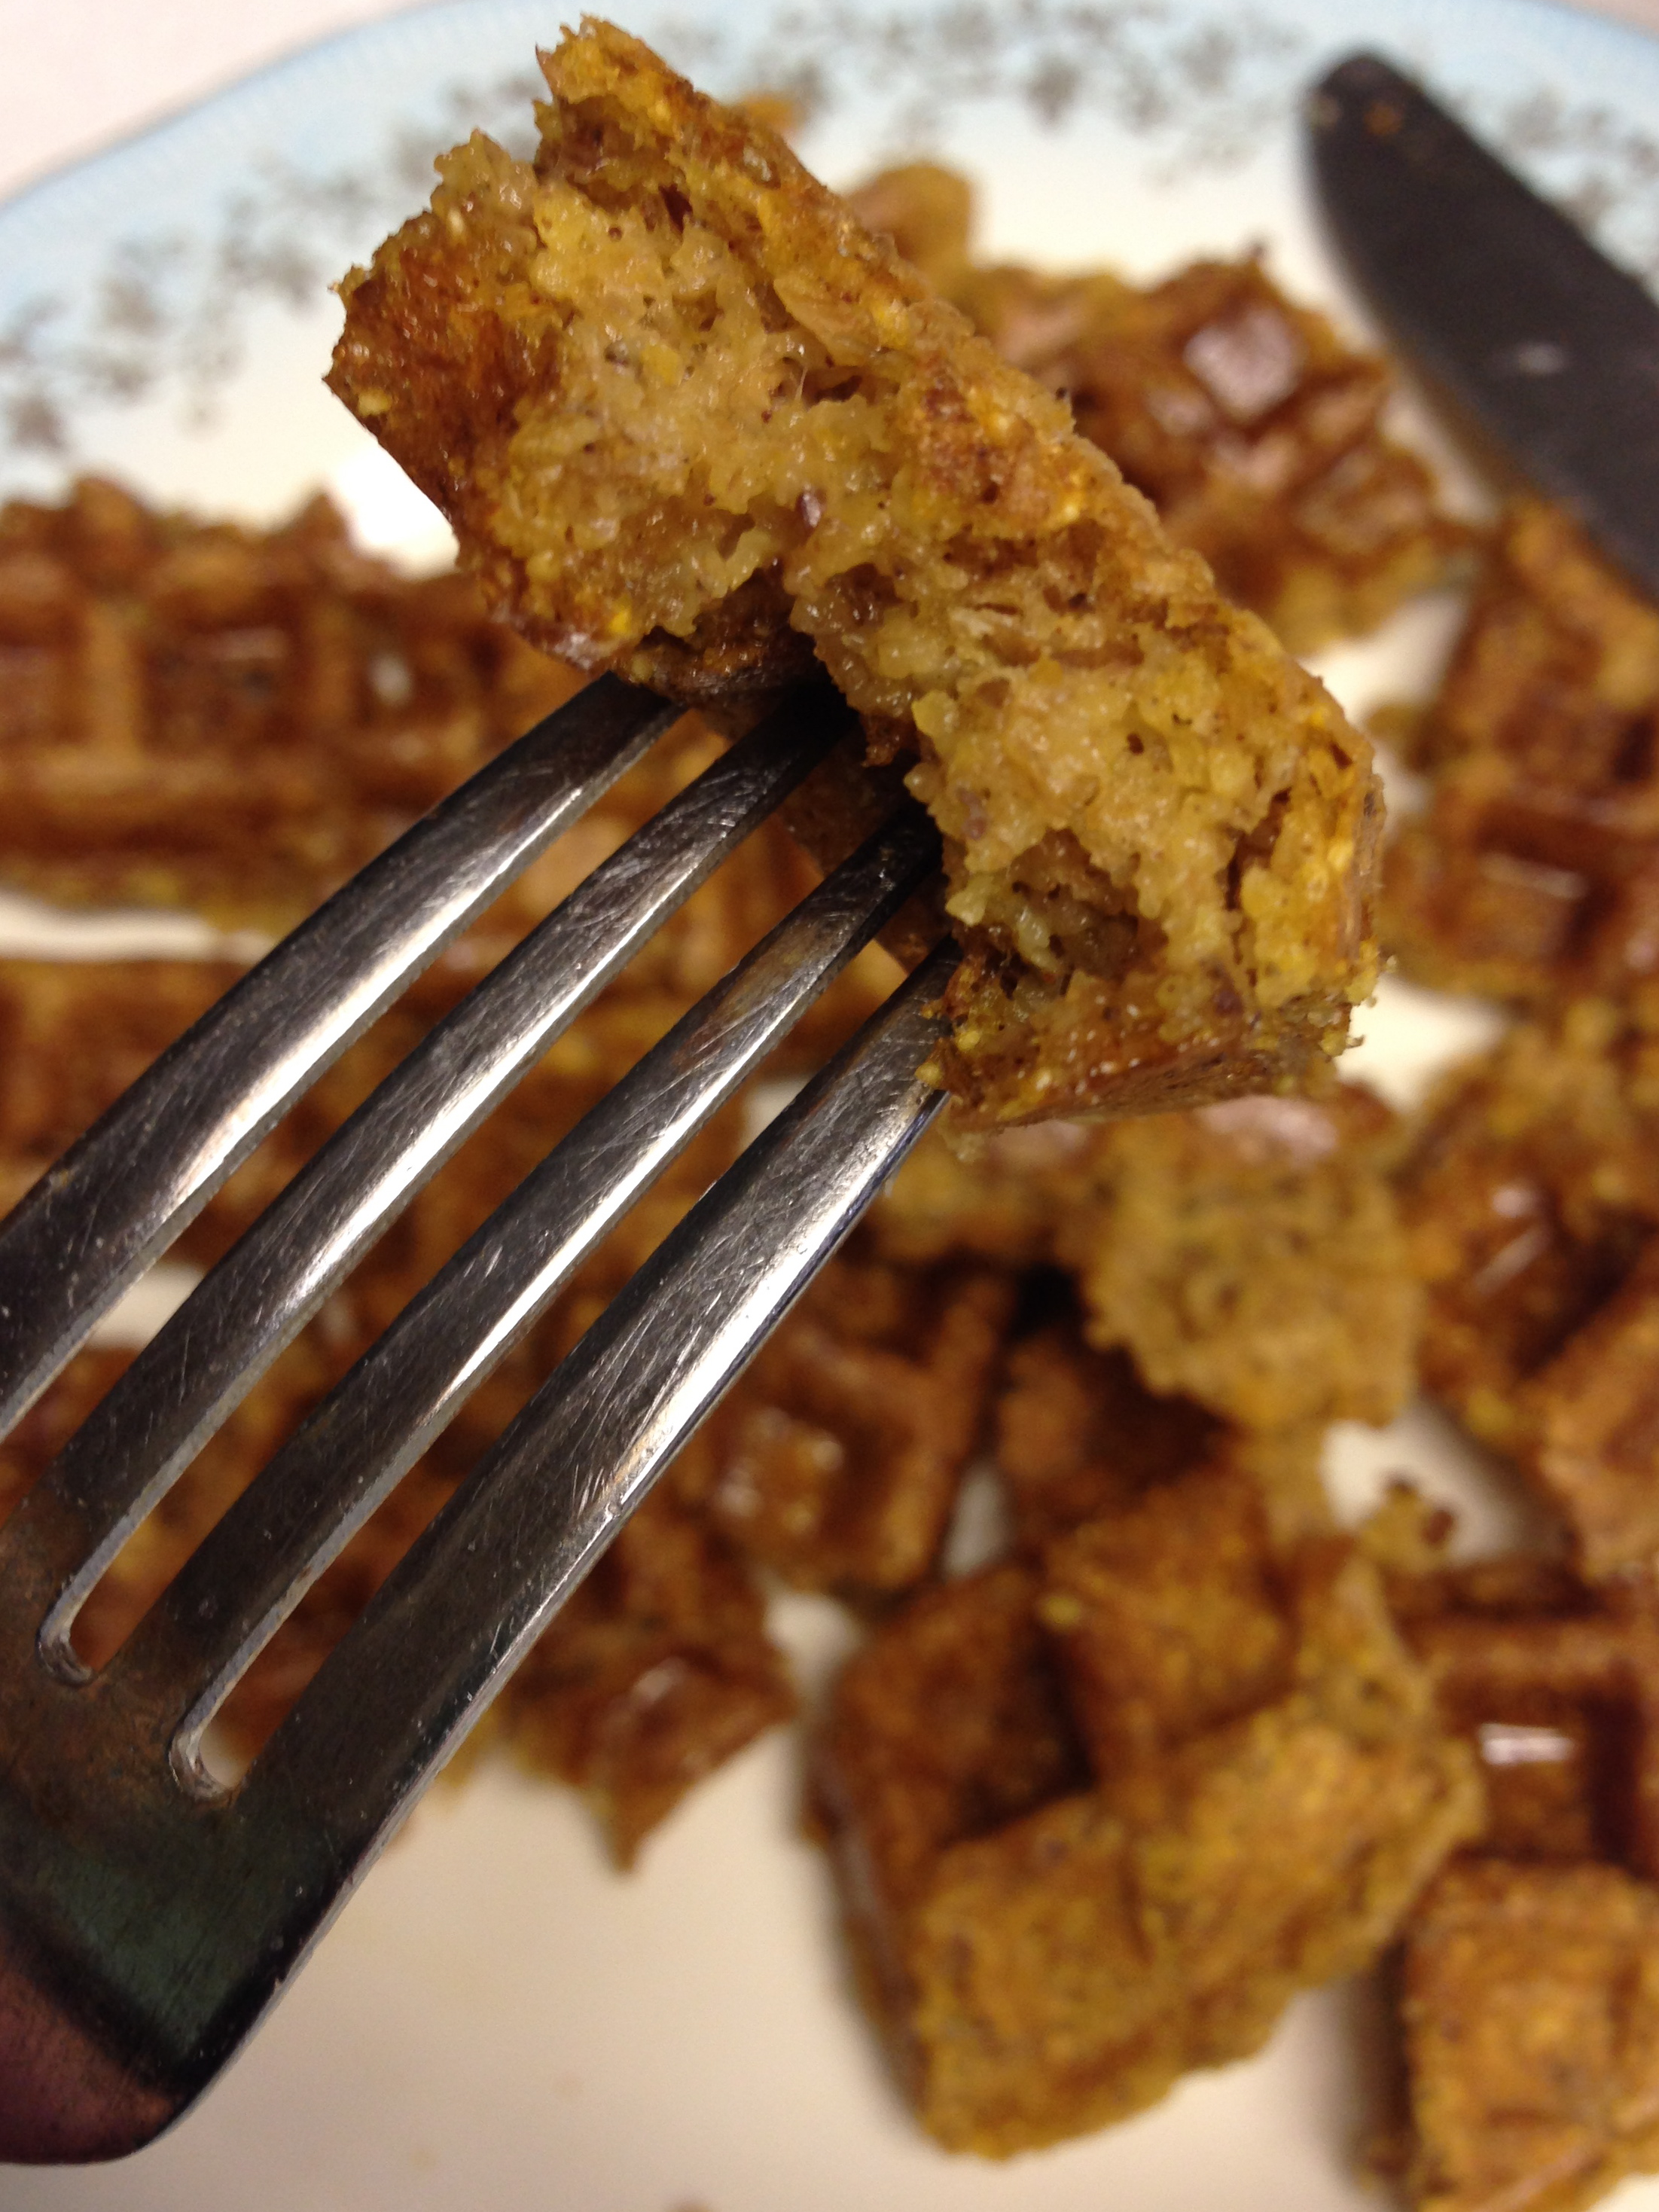
Let me just start off by saying that these Baked Mediterranean Chickpea Burgers are my new favourite veggie burgers! I’ve been trying a lot of different recipes lately for vegan burgers, as I really like having some in the freezer for quick meals, and I’m trying not to buy any processed ones full of junk (even though they taste really good). These are absolutely the best ones so far. My sister Jem and her fiancé (both omnivores) have also just finished a batch! We all love that these burgers aren’t trying to taste like meat, they just have a really awesome flavour of their own.

IMG_1052

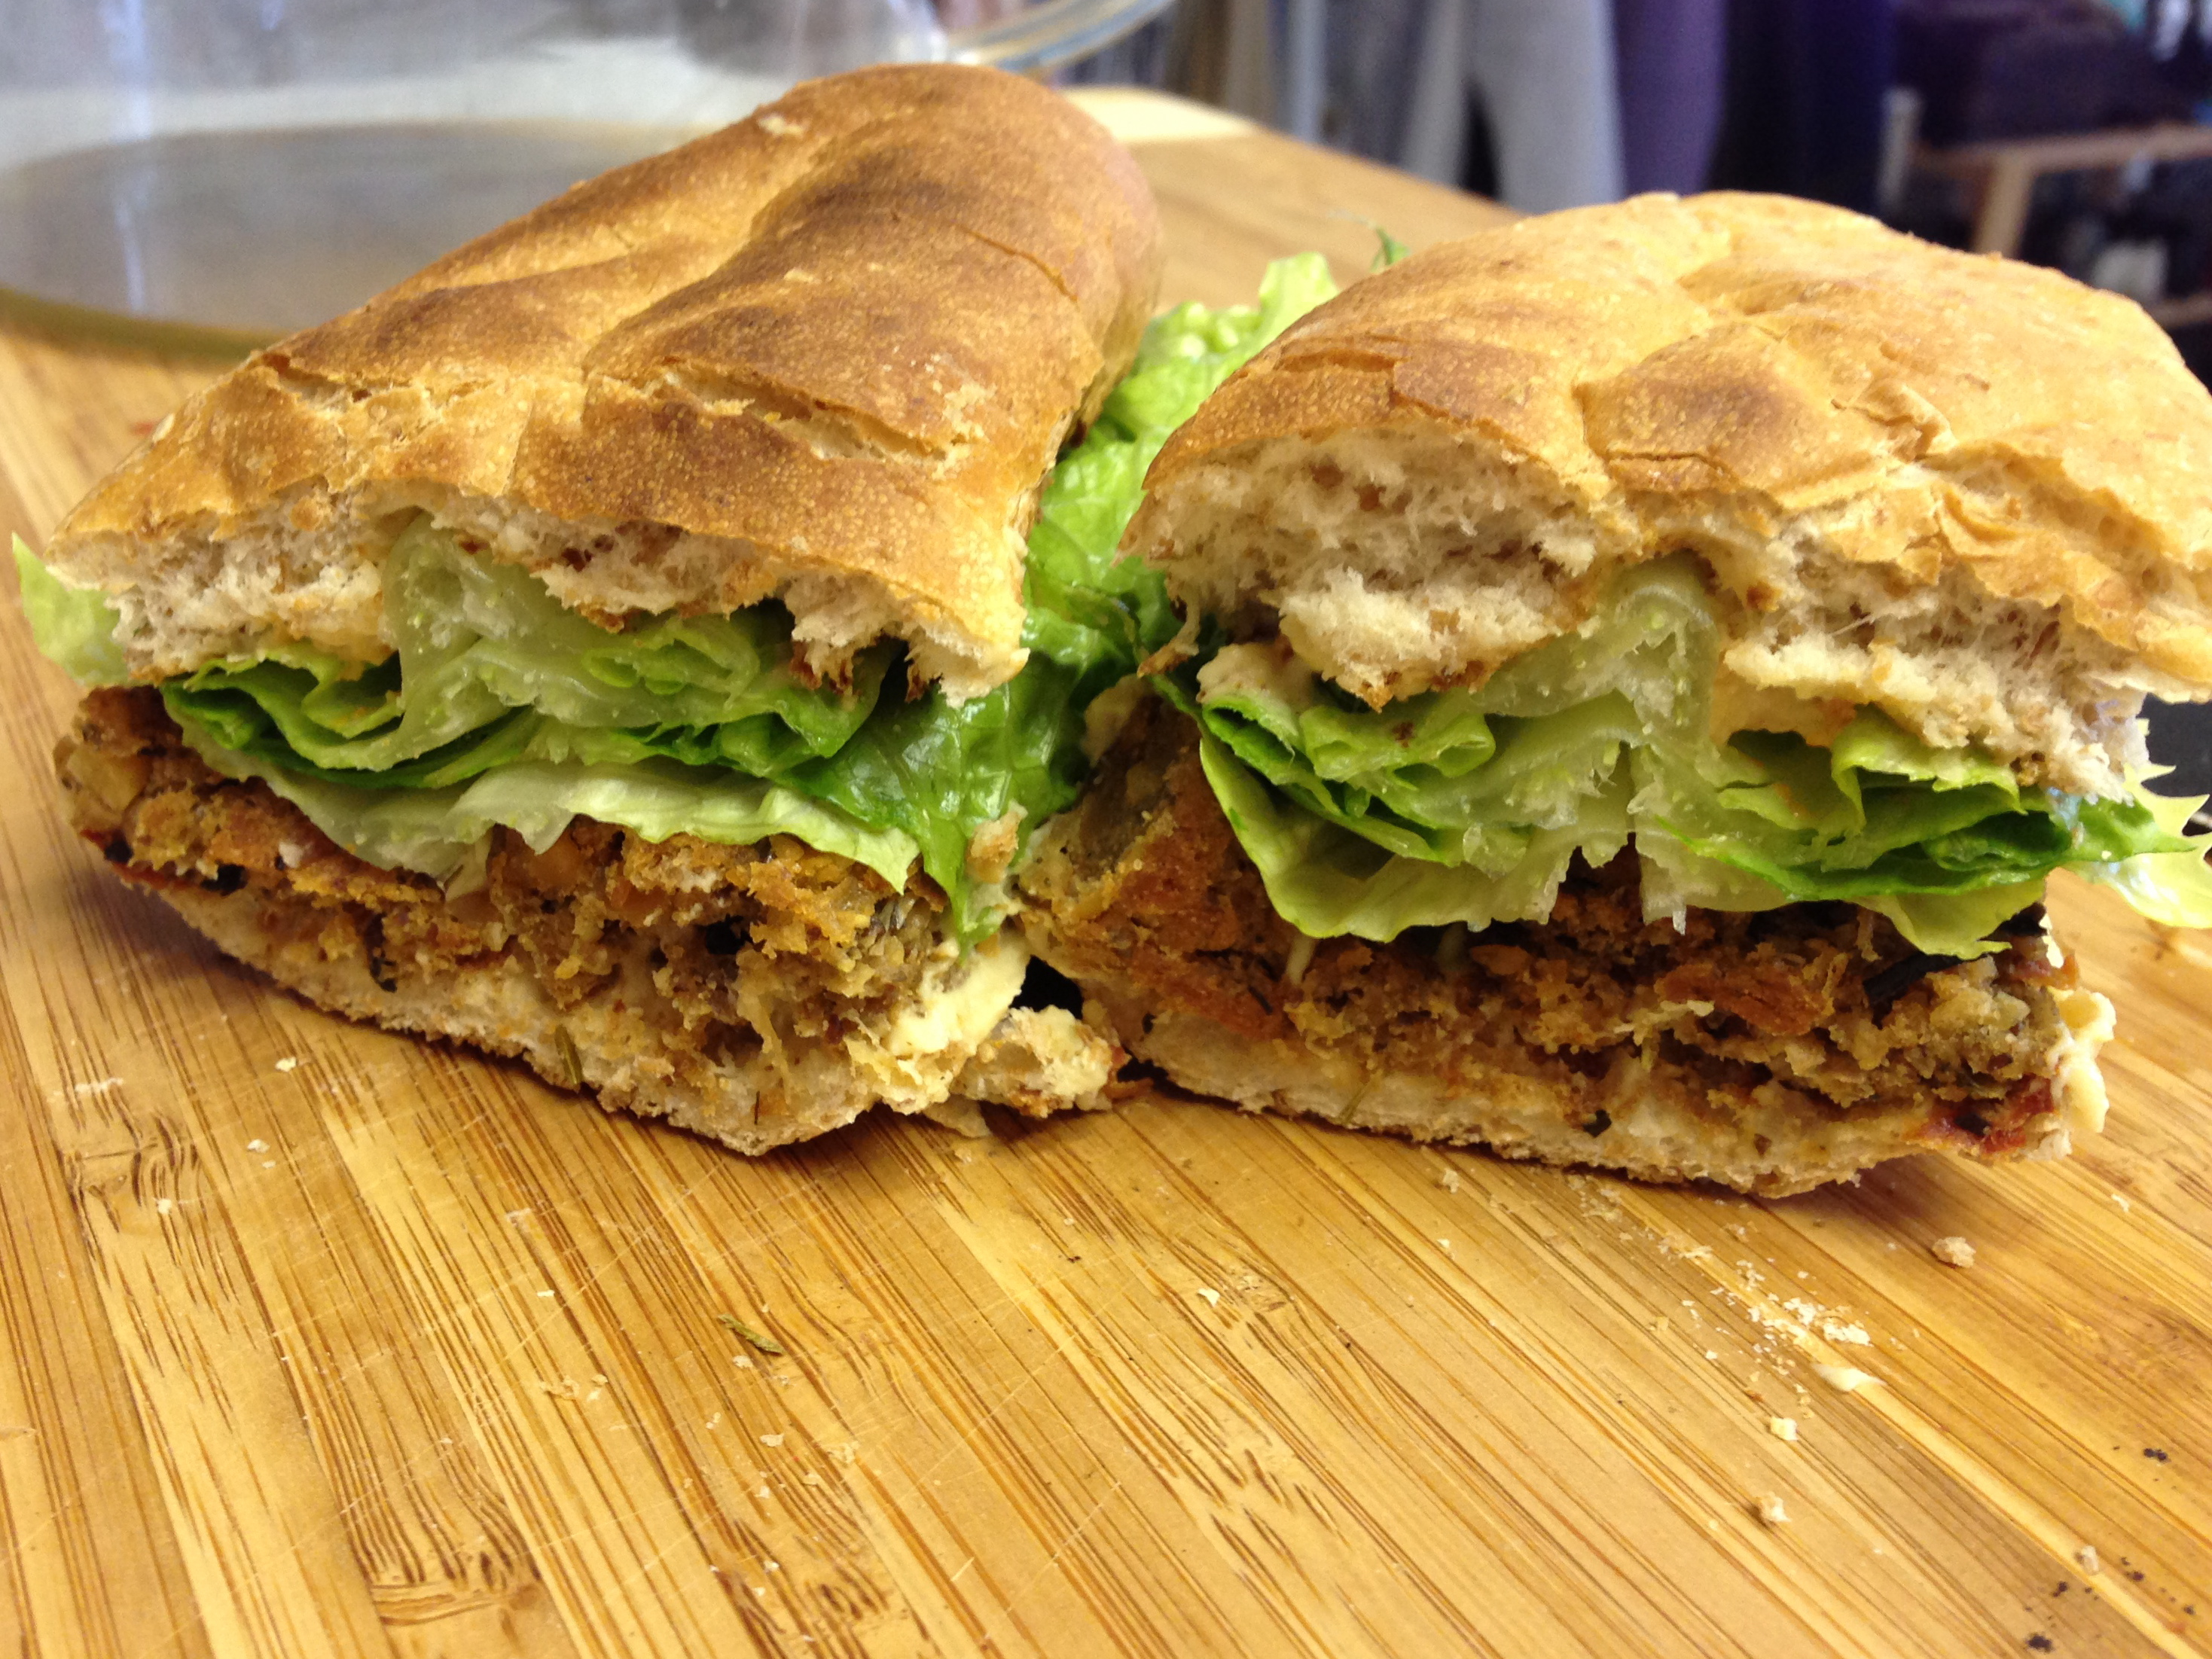
On a whole wheat bun with roasted garlic hummus, romaine lettuce, and Sriracha.

They are also very simple to make. You basically just mix everything in a bowl, make patties, and bake them. No pre-cooking of individual ingredients or food processor required.

IMG_1316

On a whole wheat wrap with melted Daiya Jalapeno Garlic Wedge, red pepper hummus, green leaf lettuce, and cucumber.

I should also mention that this recipe is based on The Post Punk Kitchen’s recipe for Double Batch Chickpea Cutlets, which are really great as is. A version of the Chickpea Cutlets also appears in Veganomicon.

IMG_1791

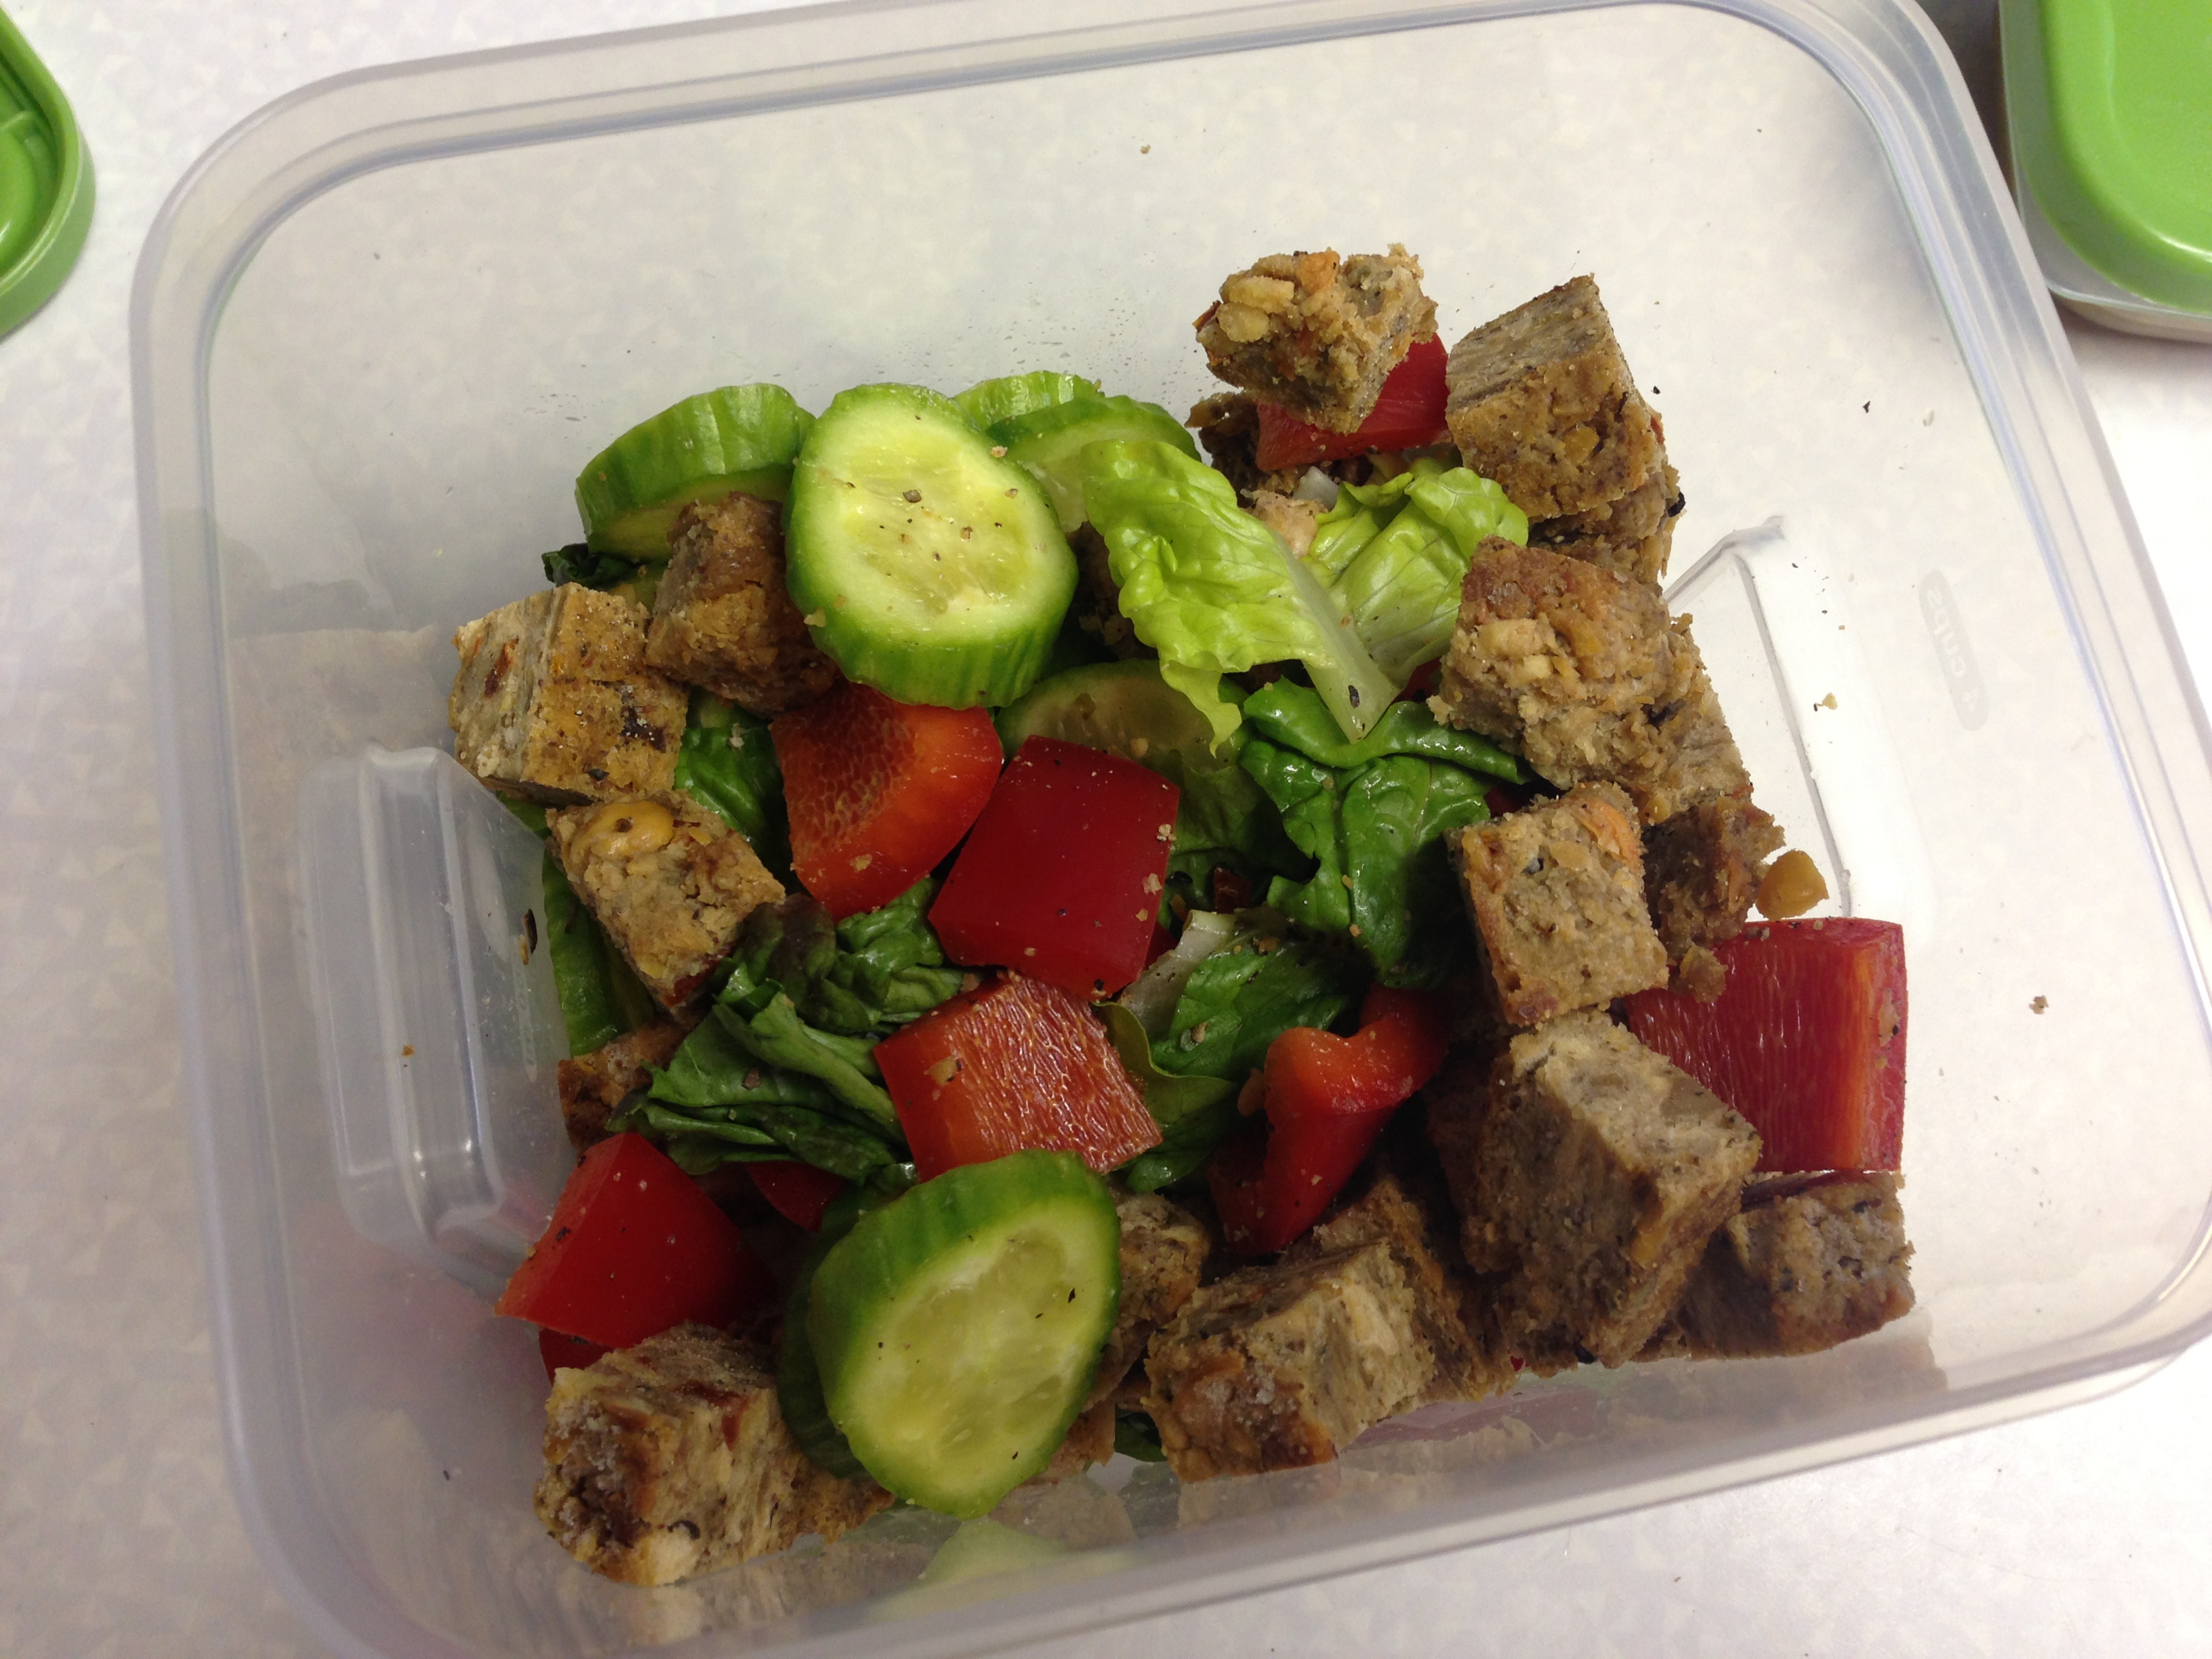
Cut up in a salad, with romaine lettuce, cucumber, red pepper, black pepper, and balsamic vinaigrette.

And now, if those photos made you hungry for some Baked Mediterranean Chickpea Burgers (they sure did for me), here’s the recipe. Go make some burgers!

Baked Mediterranean Chickpea Burgers (Yields 8 Large Patties)
¼ cup sun-dried tomatoes, roughly chopped
¼ cup hot water
1 16oz can chickpeas, drained and rinsed
¼ cup extra virgin olive oil
1 cup breadcrumbs
¼ cup ground flax seeds
4 cloves garlic, minced
2 tsp italian seasoning
1 tsp paprika
¼ cup black olives, roughly chopped
1 cup vital wheat gluten
1 cup water or vegetable broth
¼ cup soy sauce

Notes:
– I buy sun-dried tomatoes in a dry package. Obviously if you have oil-packed sun-dried tomatoes you won’t need to rehydrate them
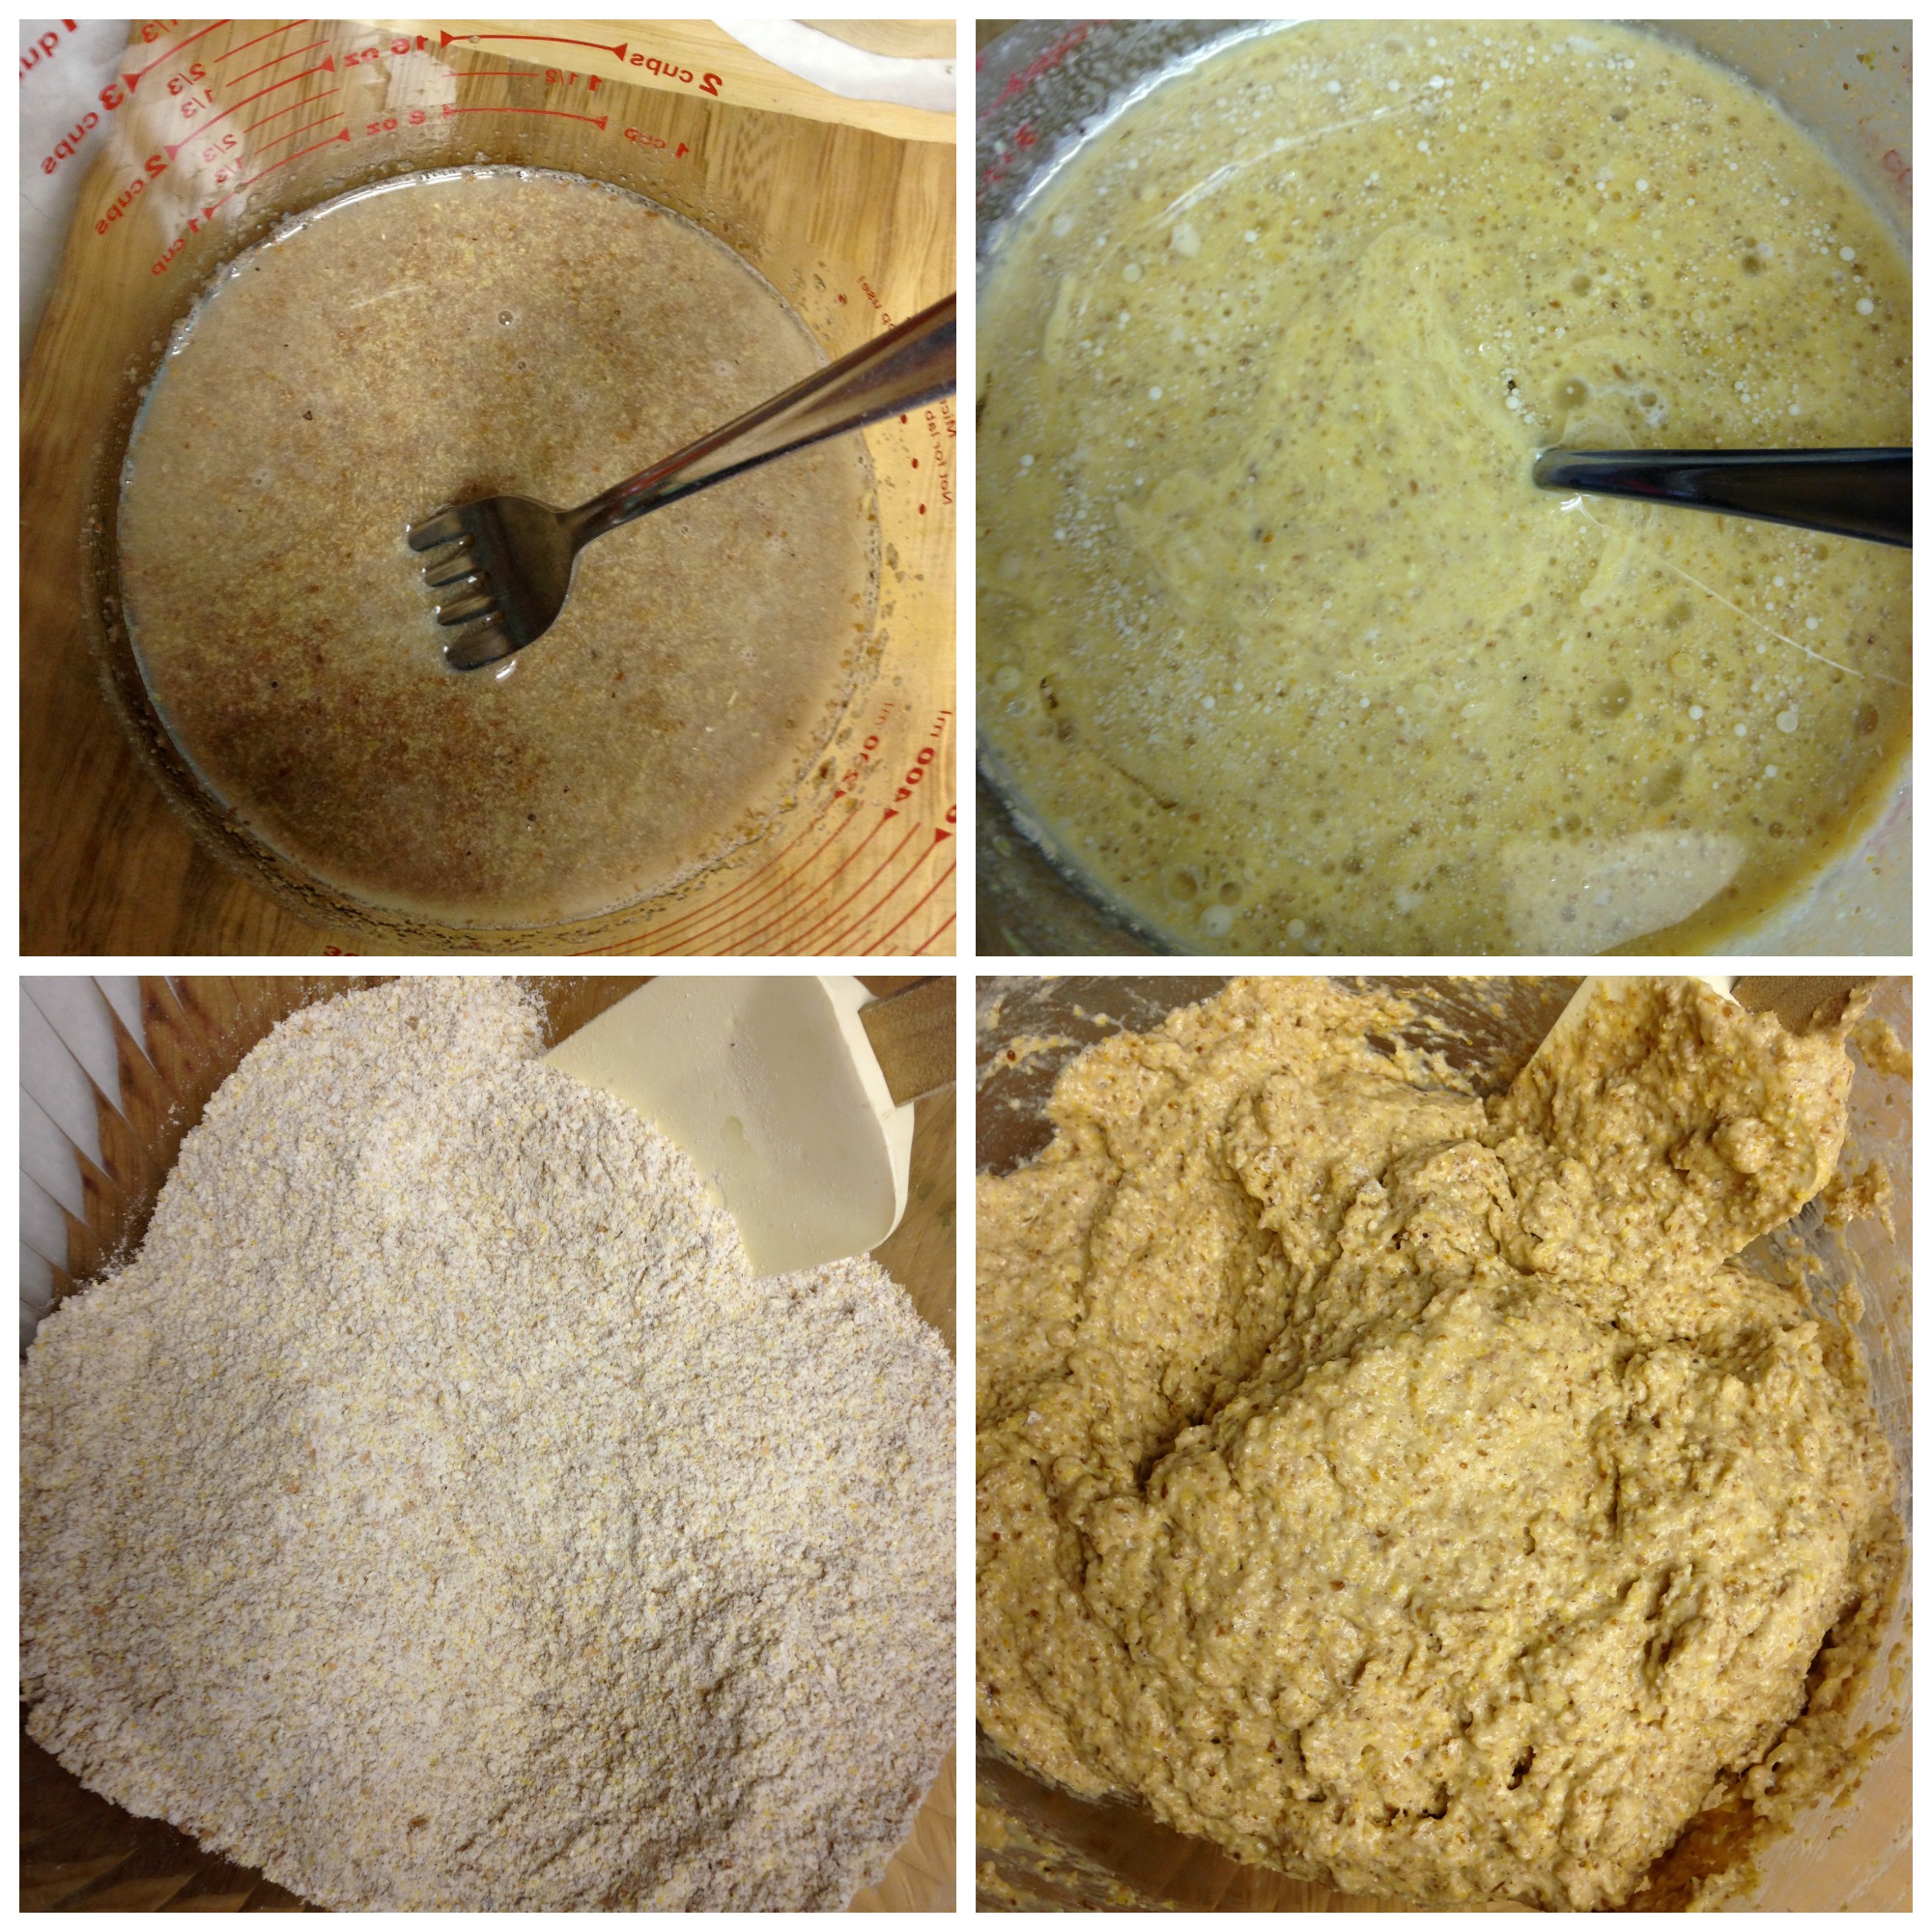
– Instead of mashing the chickpeas and olive oil in a bowl, you can choose to pulse them in a food processor. I prefer not to dirty the food processor just for this. Just don’t process them for too long, otherwise you’ll end up with hummus.

– For some extra flavour, you can include the water you soaked the tomatoes in, in the 1 cup of water or vegetable broth.
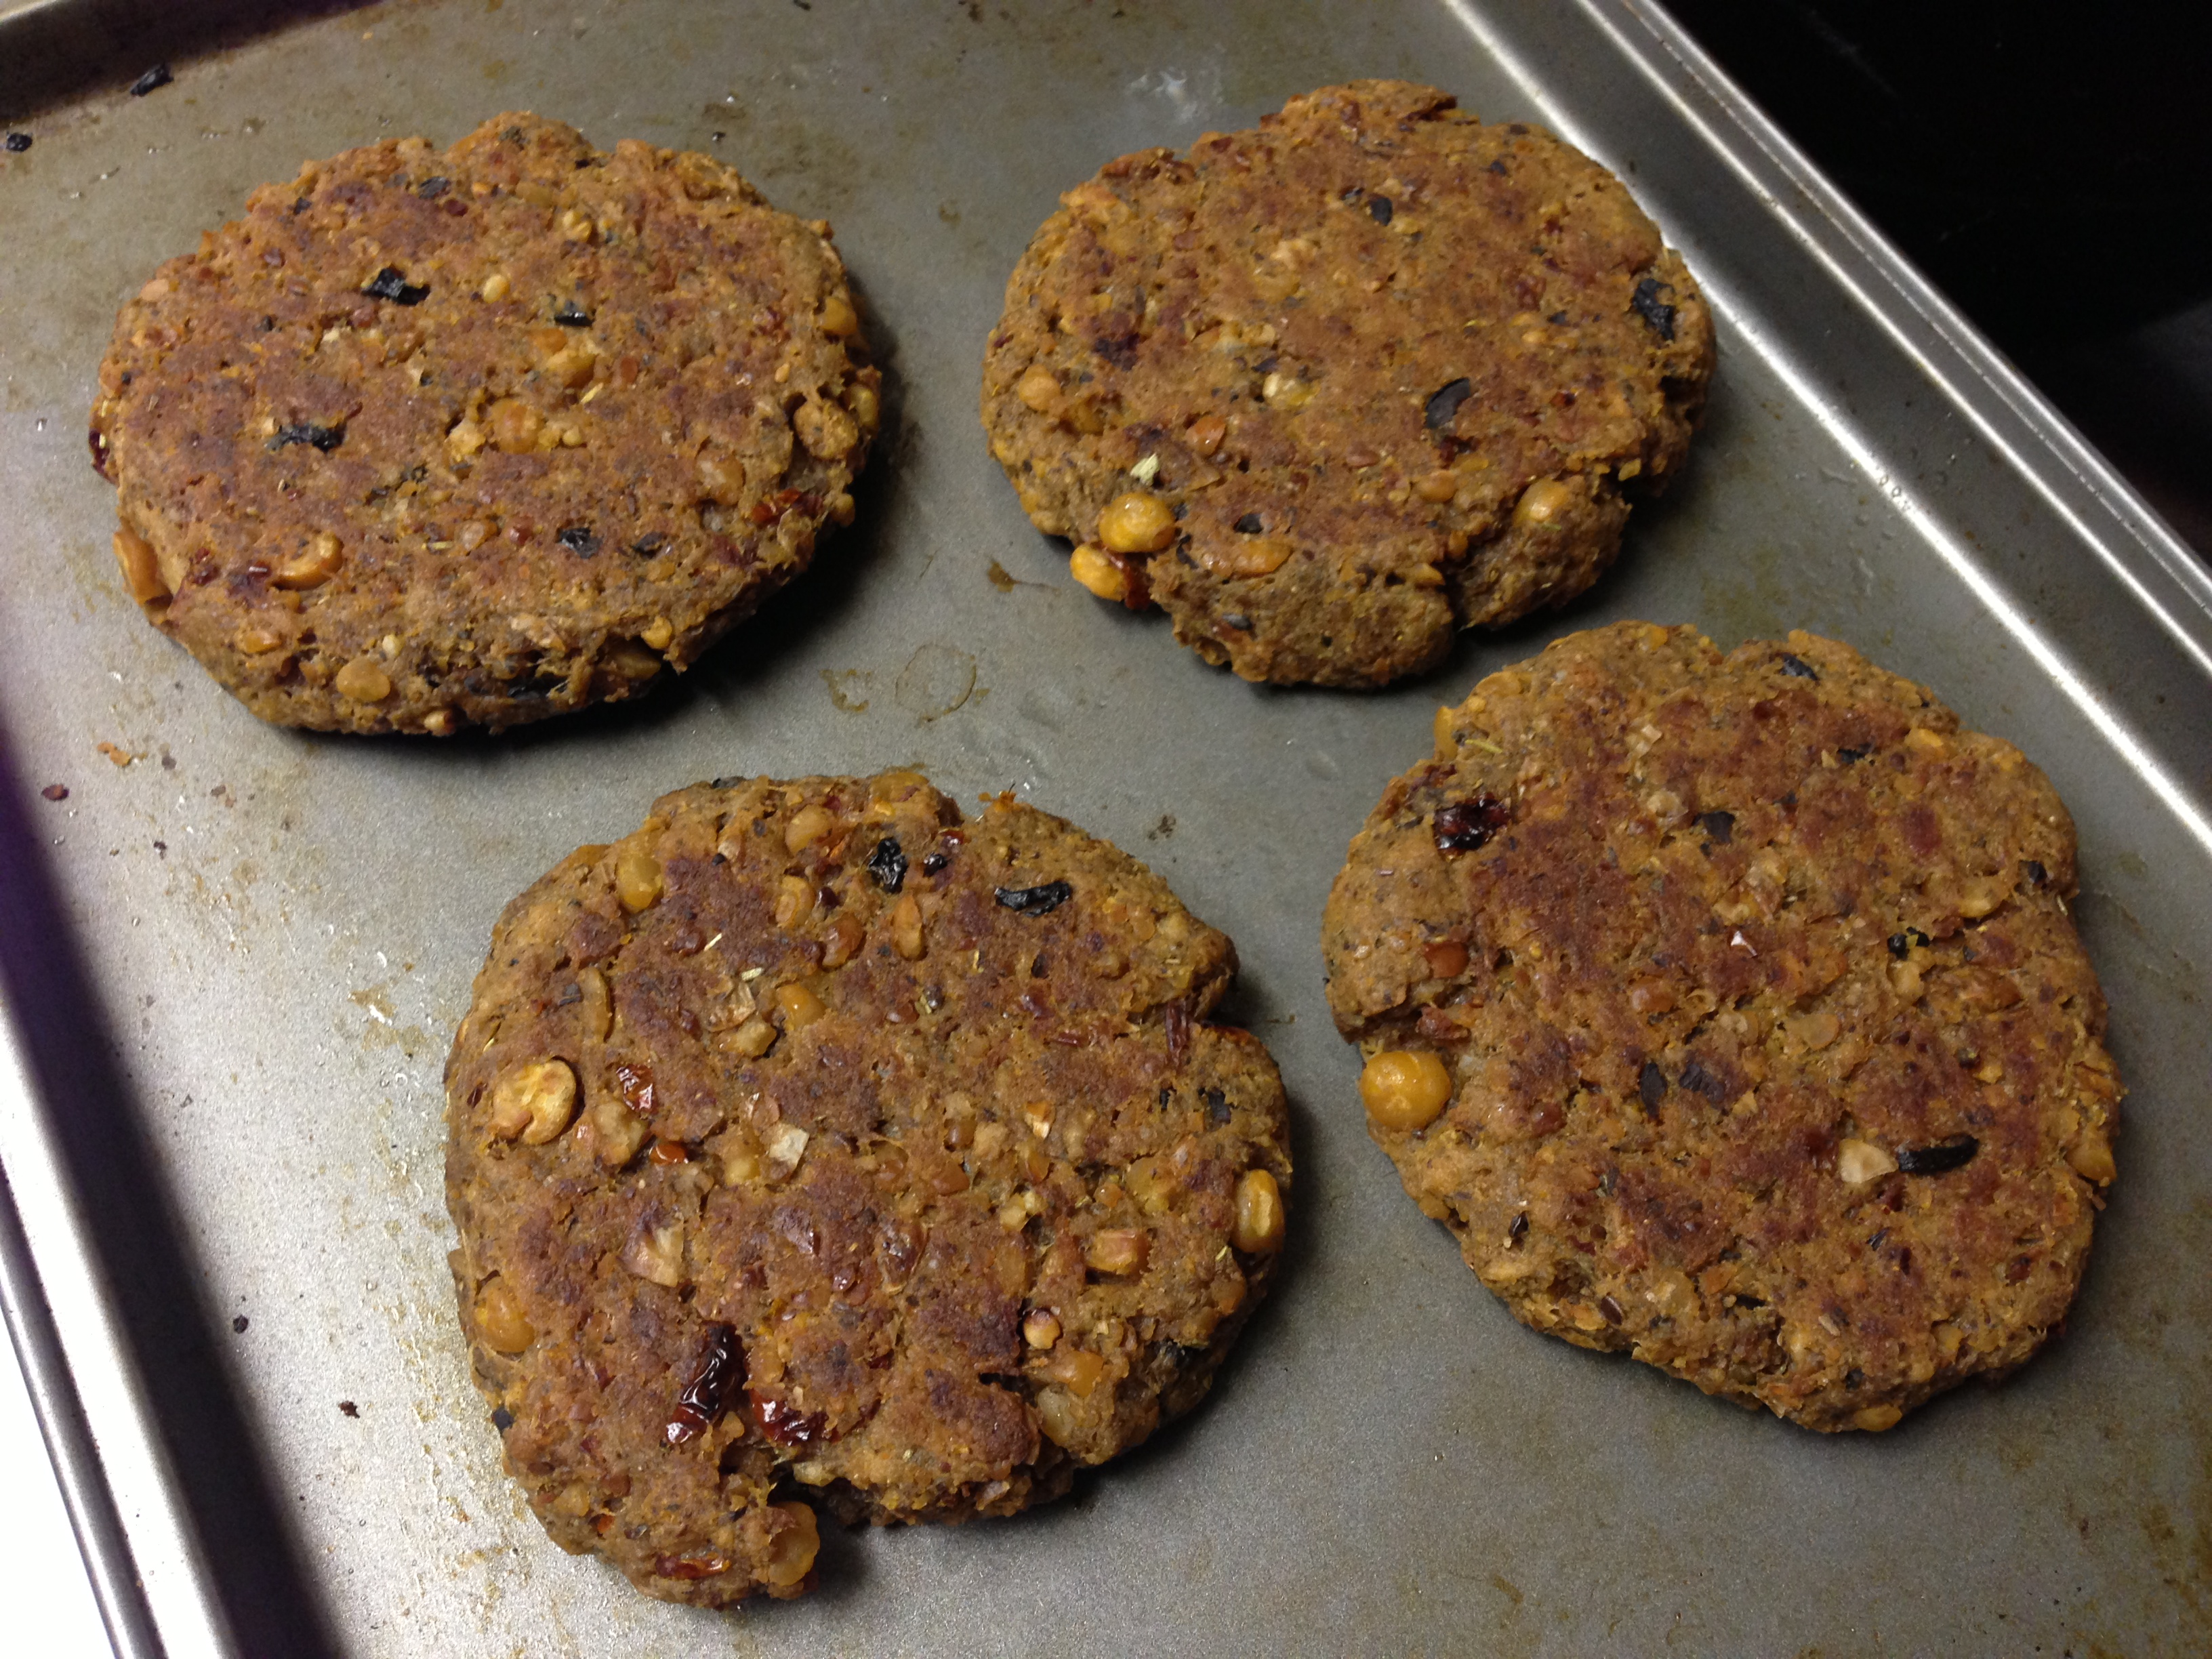
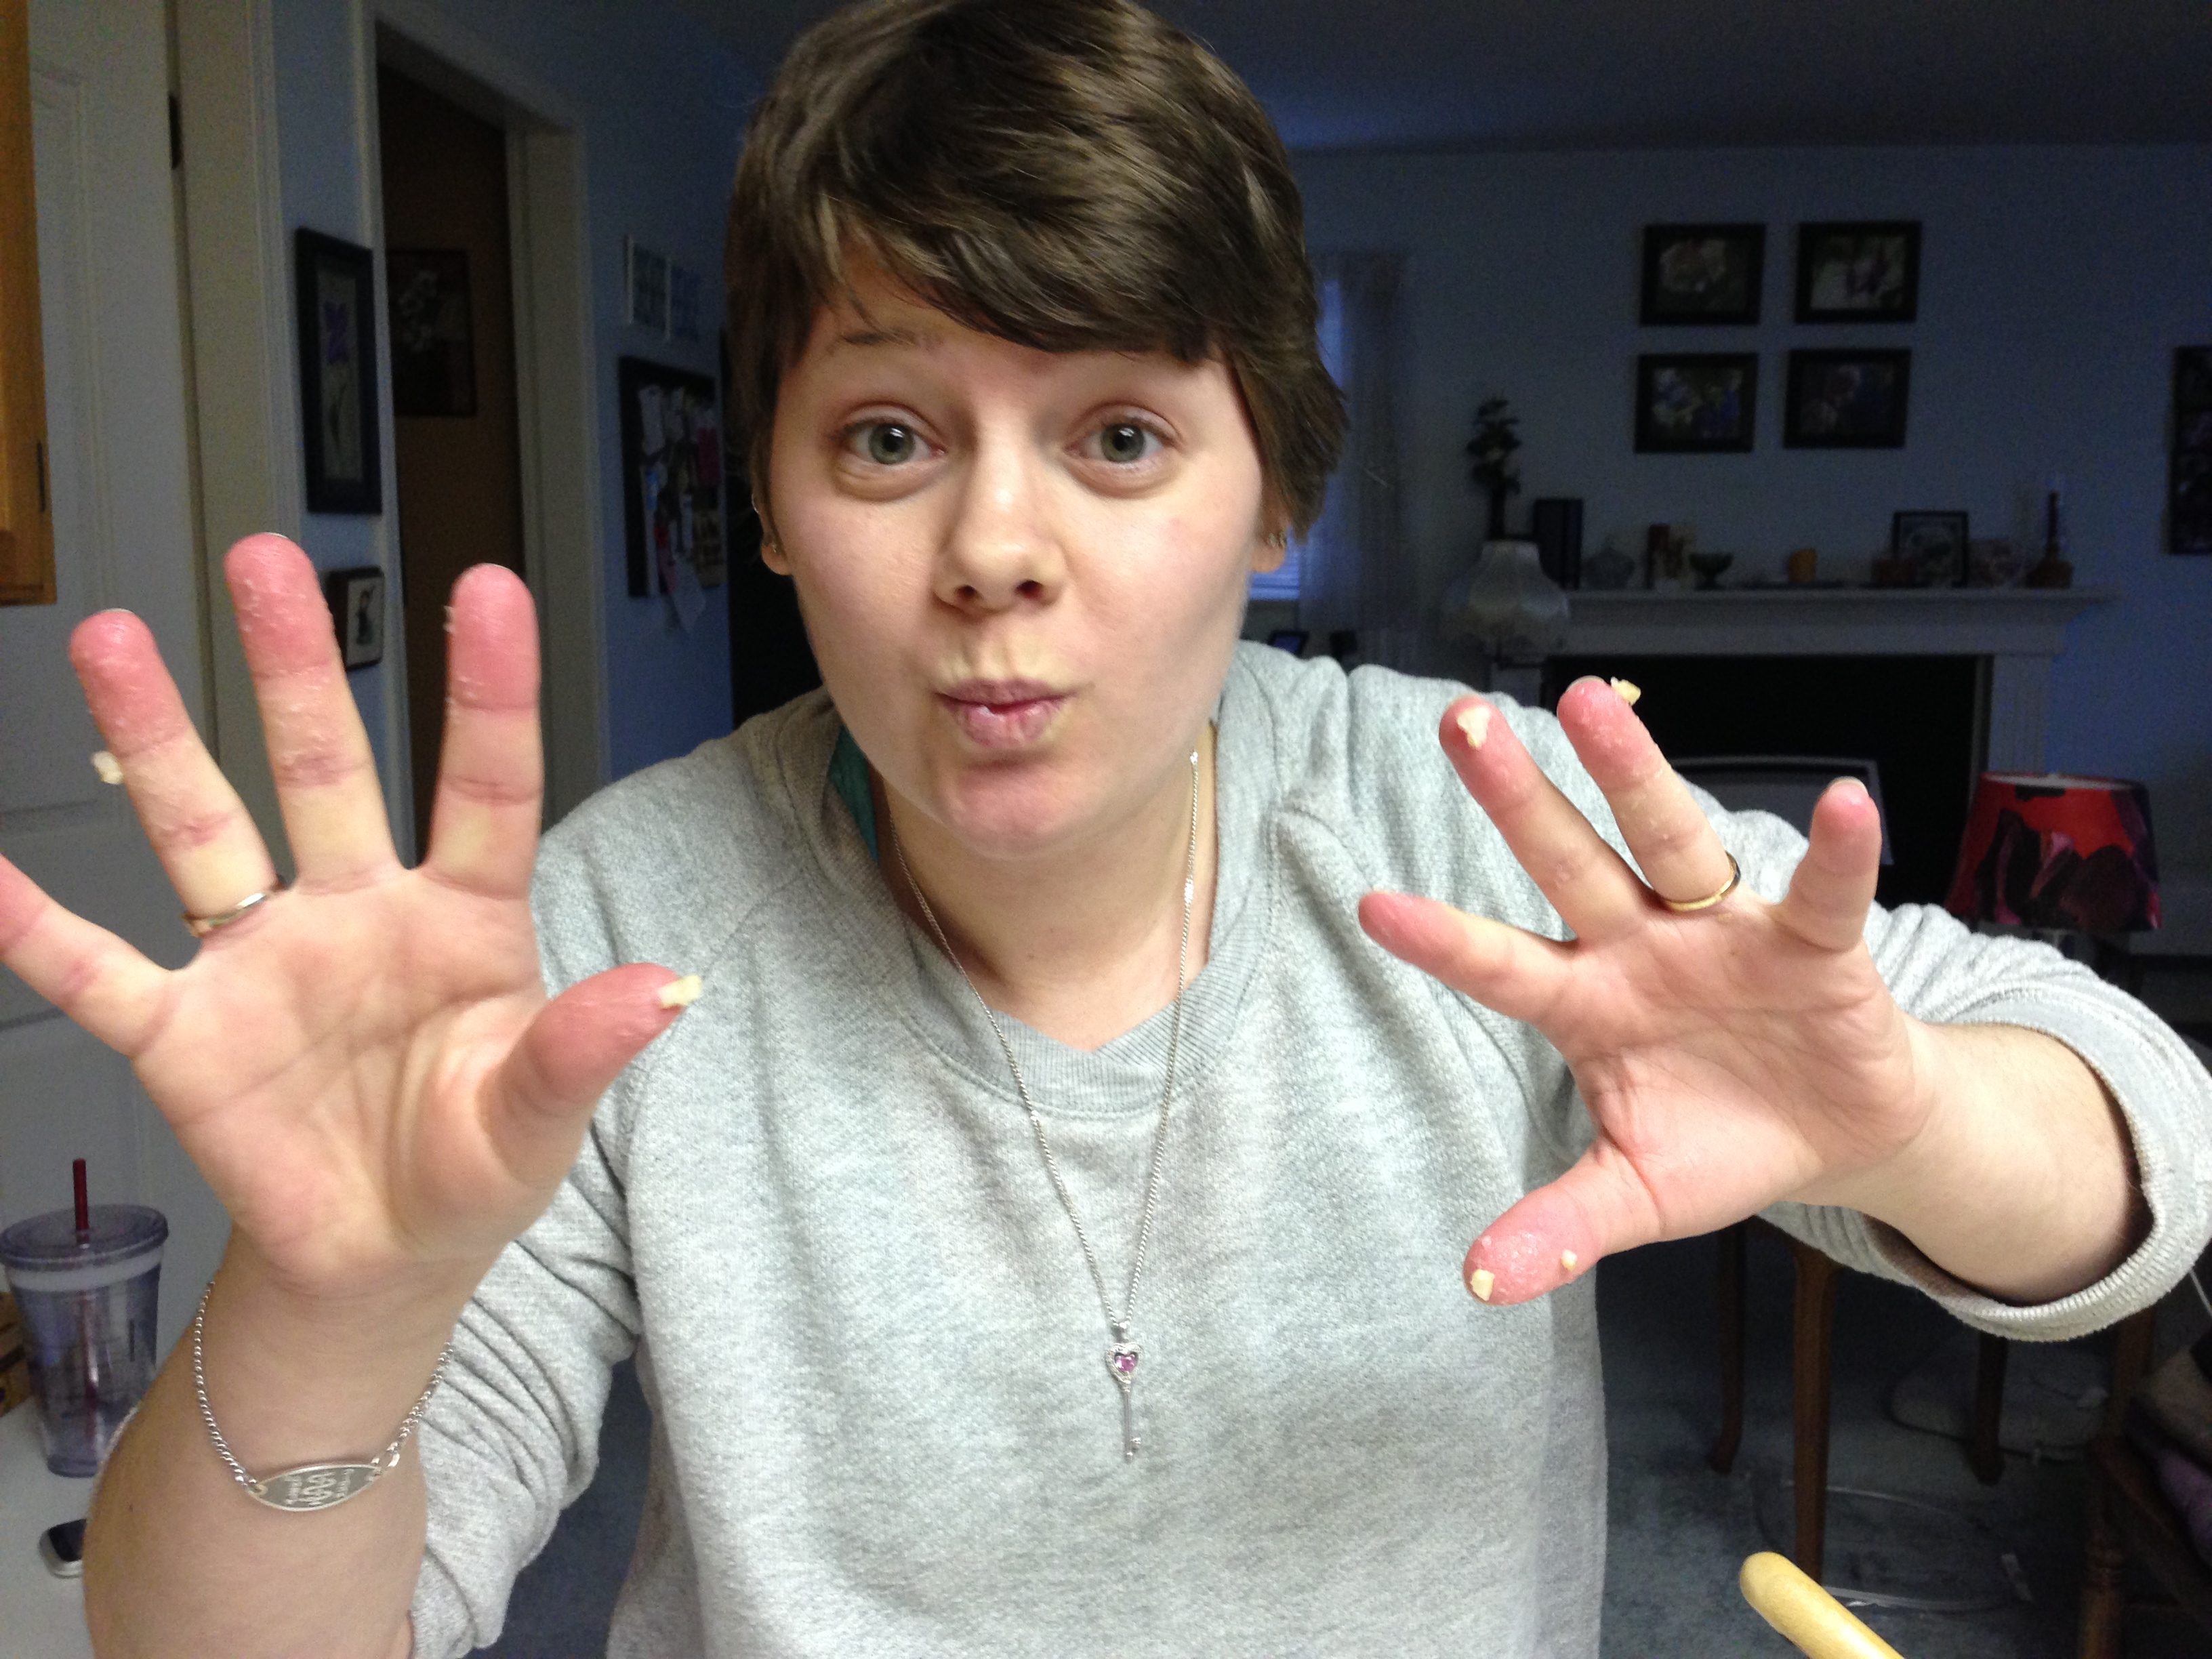
– If you’re not sure what the ‘strings of gluten’ should look like, this photo should help. 

Place the chopped up sun-dried tomatoes in a small bowl with the hot water and set aside for at least 10 minutes before using them.
Place the chickpeas and olive oil in a large bowl and mash with a fork or masher just until there are no whole chickpeas left.
Add all of the other ingredients into the bowl with the mashed chickpeas, including the now rehydrated sun-dried tomatoes. Knead everything together for about 3 minutes, or until strings of gluten appear.
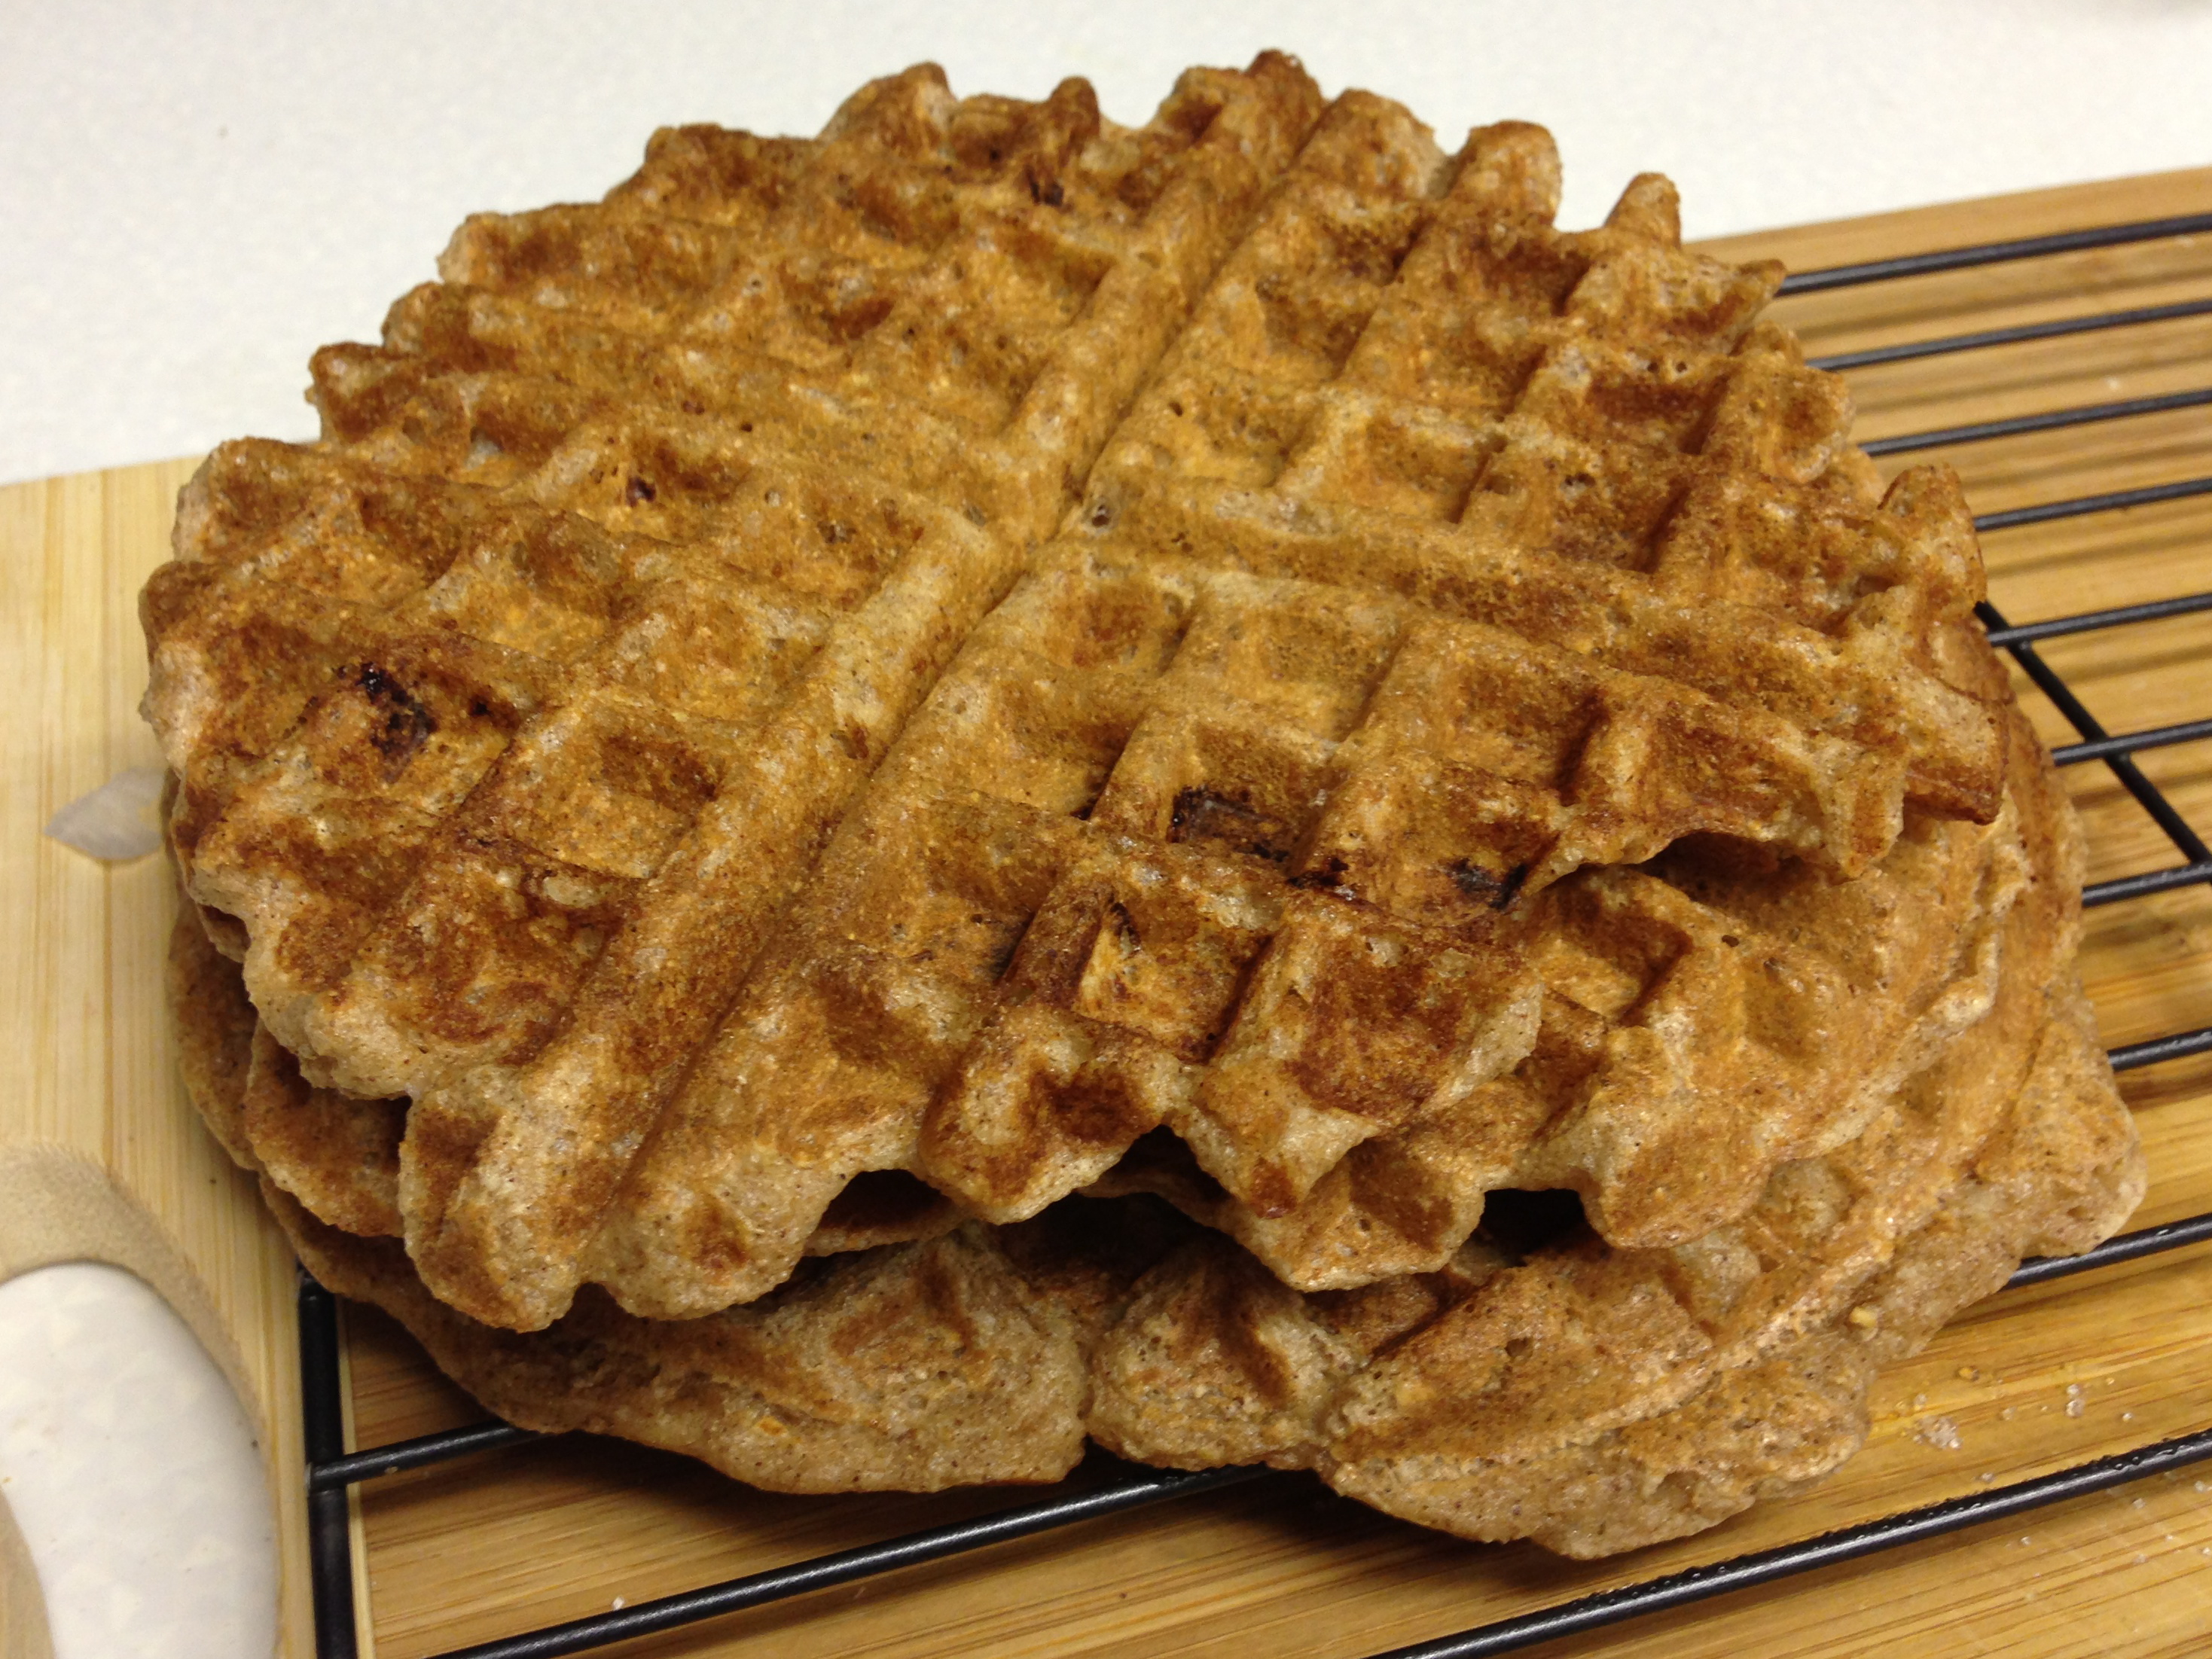
Separate the dough into 4 equal(ish) pieces, then divide each piece into 2. You should now have 8 pieces. Shape each piece into a patty. This can easily be done by rolling it into a ball, then flattening and shaping it into a disc between your hands. They should be roughly half an inch thick.
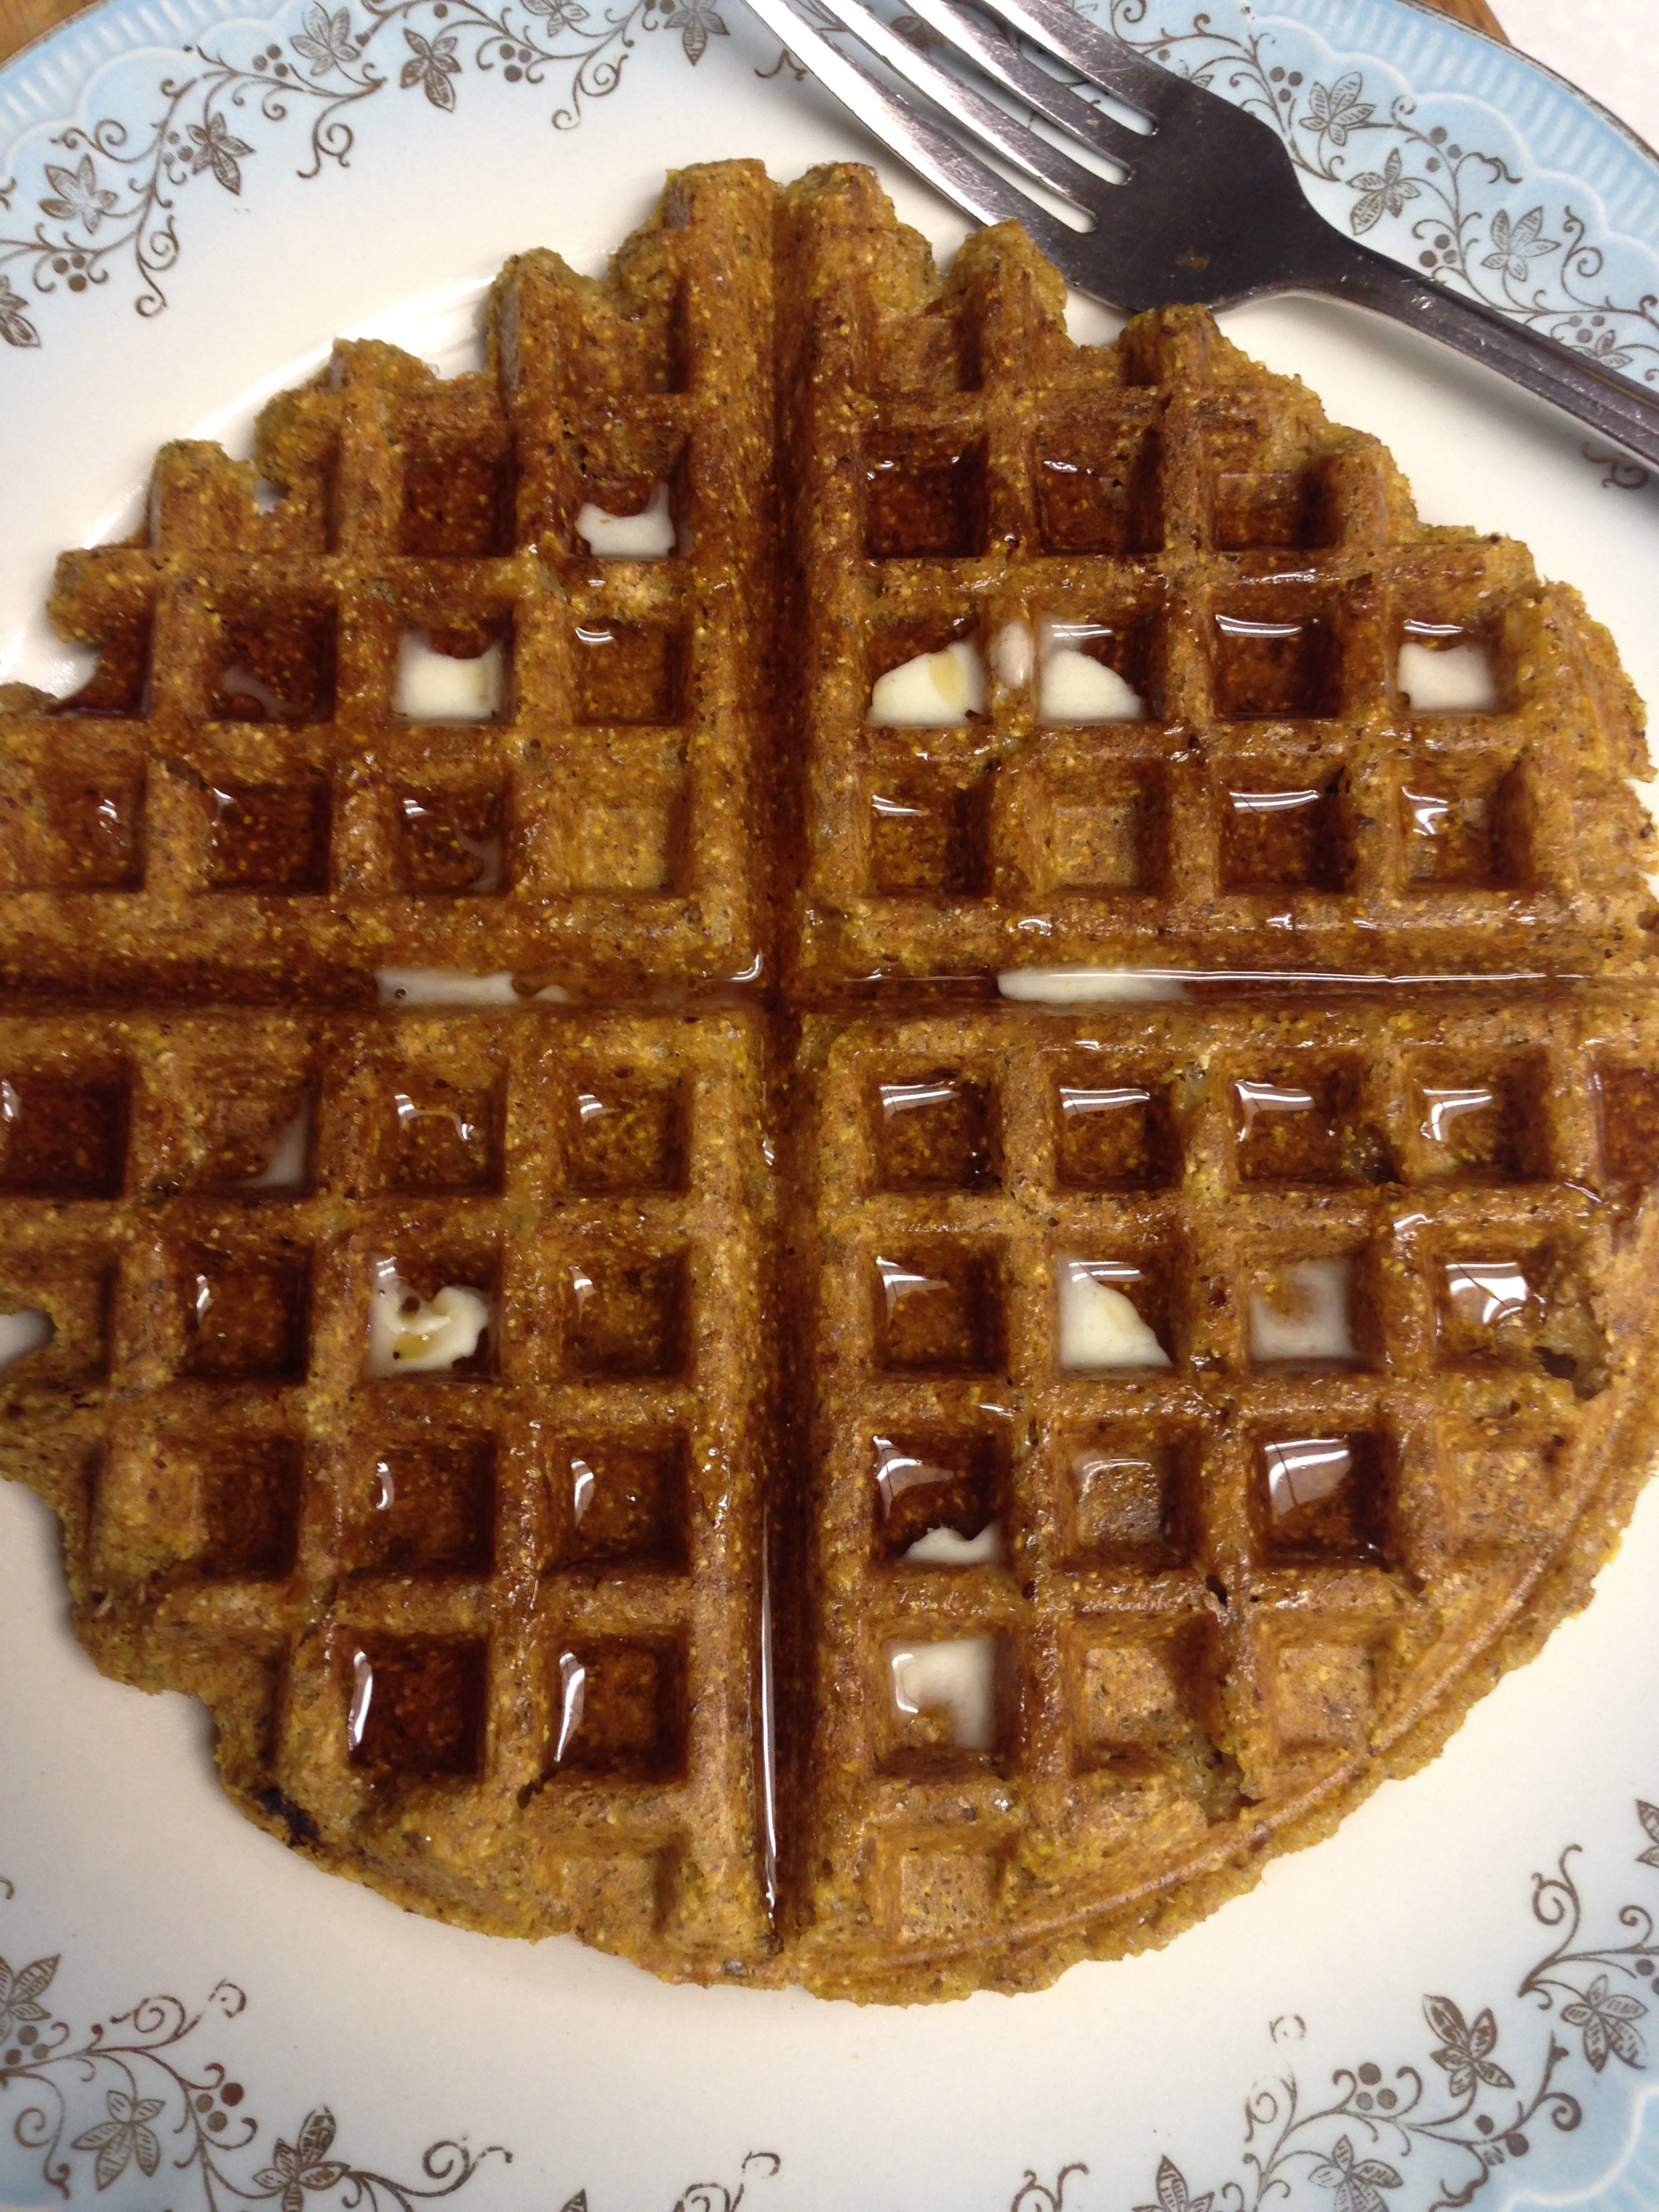
Place the patties on a lightly greased baking sheet and bake at 375°F for 20 minutes. Remove from oven, flip, and bake for another 8-10 minutes.
Enjoy!

IMG_0993

IMG_0995

IMG_1004

Enjoy these Mediterranean Chickpea Burgers right away, or let cool and freeze them for later. I usually make veggie burgers specifically for the freezer, because they are awesome for making quick filling meals. The patties can be reheated any way you choose: in a microwave, in a pan, or on the barbecue.

I’ve shared this post with Allergy-Free Wednesdays Week 67, Healthy Vegan Friday #43, and Wellness Weekends.

You May Also Enjoy:
IMG_1694IMG_0609100_3859
Nacho Cheez White Bean Spread, Basic No-Mayo Coleslaw, Butternut Squash Black Bean Burritos

A Vegan Sushi Feast!

Jem and I tried our hands at making sushi for the first time ever, and we ended up with a sushi feast (and a lot of photos)!

IMG_1399

IMG_1344

Can you tell Jem’s excited to make some vegan sushi!?

Apparently I was so excited about making vegan sushi that I forgot to record any amounts for our ingredients. Luckily, this wasn’t really intended to be a recipe, so I’ll just share with you what I do know. I cooked 2 cups of short grain brown rice, then added coconut sugar and rice wine vinegar according to someone’s directions.

For our fillings we used avocado, cucumber, asparagus, spicy smoked tofu, and portobello mushrooms. The avocado and cucumber were simply sliced into strips. The asparagus was steamed. For the tofu, we sliced up half a block of Soyganic Smoked Tofu into thin strips and quickly sautéed it with sesame oil, soy sauce, and Sriracha. The mushroom was actually a remainder from my portobello burger dinner the night before. It was grilled on the barbeque with just a little oil and black pepper, then thinly sliced for our sushi.

IMG_1340

IMG_1346

How To Roll Sushi
I’m no expert, but I did find it to be surprisingly easy and quick once we got the hang of it. The process is difficult to explain, so I took some step-by-step photos for you. (Big thanks to my lovely hand-model/super-sister Jem!) As you can see, we used plastic wrap in between our sushi mat and the nori, but it probably isn’t necessary unless you want to make inside out rolls.

IMG_1347IMG_1348

IMG_1376IMG_1357

IMG_1358IMG_1359

IMG_1362IMG_1363

IMG_1379IMG_1386

IMG_1390

IMG_1398

Also, it really doesn’t hurt if you stop and take a photo like this. 🙂

IMG_1351

And don’t forget to have a little bowl of water and rice vinegar on hand to wet your fingers, otherwise they’ll look like this. 🙂

IMG_1374

As you can tell from the photos, we ended up with a tonne of sushi! (I ate it for lunch for the next two days.) Basically, we were quite unsure of how much rice or fillings we needed, so we made a lot, and kept making rolls until the rice was all gone. This was actually really nice, because it gave us a chance to do some experimenting with different filling combinations and different amounts of rice. Our package of nori said to use 1 cup of rice for each sheet so this is what we did for the first couple rolls, but they turned out larger than we like. We’ll be using 2/3 to 1/2 cup of rice from now on.

Here’s some of our combinations.

IMG_1383IMG_1387

Avocado/cucumber/asparagus. Tofu/mushroom/cucumber.

IMG_1391IMG_1392

Tofu/avocado/cucumber. Tofu/avocado/cucumber/mushroom/asparagus.

Last step: sit down and enjoy your delicious home-made vegan sushi!

IMG_1404

Making sushi at home can be really fun, and a lot easier than you may think. Also, because you choose the ingredients, it can be a lot healthier than restaurant sushi (especially if you use brown rice and no refined sugar). Plus, you can easily customize it to suit your specific dietary needs.
Gluten-free? Make sure your rice is gluten-free (I love Lundberg and it is) and use gluten-free tamari in place of soy sauce.
Soy-free? Just skip the tofu and soy sauce.
Oil-free? Just omit the sesame oil when sautéing the tofu

Enjoy!

I’ve shared this post with Slightly Indulgent Tuesday (4/9/13), and Allergy Free Wednesdays #62, Healthy Vegan Friday #38, and Gluten Free Fridays #35.